![[NestJS] ValidationPipe를 이용해 Request 편하게 검증하기 (class-validator)](https://img1.daumcdn.net/thumb/R750x0/?scode=mtistory2&fname=https%3A%2F%2Fblog.kakaocdn.net%2Fdn%2FbgDS7M%2FbtsrZj5ZUIg%2F7AiMC9OapMcrCIdupaElW0%2Fimg.png)
전제 조건
- controller를 만들어 놨다. (전혀 상관 없다. 그냥 이 글에 시작점이 여기라 적어놨다.)
- dto를 만들어 놨다.
- 전역으로 선언해주는 방식도 있지만 여기서는 다루지 않는다.
시작
1. 각종 디펜던시를 설치한다.
- dependencies
"class-validator",
"class-transformer"
2. 적용할 dto 안에서 임포트 해주고 적절한 데코레이터를 사용해준다.
- 여기에 선언해준 key들은 참고만 해주면 된다.
import { IsNotEmpty, IsString, Length, Matches } from "class-validator";

export class createUserDto {

    @IsNotEmpty()
    @IsString()
    @Matches(RegExp(/^[A-Za-z]{1}[A-Za-z0-9]{3,19}$/))
    USER_ID: string;

    @IsNotEmpty()
    @IsString()
    @Matches(RegExp(/^(?=.*[a-zA-Z])(?=.*[!@#$%^*+=-])(?=.*[0-9]).{8,20}$/))
    // @Matches(/^[A-Za-z\d!@#$%^&*()]{8,30}$/, {message:"ㄹㅇㄴㅁ"})
    USER_PW: string;

    @IsNotEmpty()
    @IsString()
    @Length(11,11)
    USER_PHONE: string;

    @IsNotEmpty()
    @IsString()
    USER_NICKNAME: string;

}
3. 컨트롤러에 넣어주면 끝이다 너무 간단하다.
- ValidationPipe, Dto 를 임포트 @Body 데코레이터에 넣어주는 부분만 보면 된다.
import { Body, Controller, Post, ValidationPipe } from '@nestjs/common';
import { UserService } from './user.service';
import { createUserDto } from './dto/create.user.dto';

@Controller('user')
export class UserController {

    constructor(
        private readonly userService: UserService
    ) {};

    @Post('/create')
    create(@Body(ValidationPipe) createUserDto: createUserDto) : createUserDto{
        this.userService.create(createUserDto)
        return createUserDto;
    }
}
4. 테스트용을 따로 만들어보고 테스트 해보자
- create.user.dto.ts
- @IsNotEmpty 데코레이터로 빈값을 보내면 에러를 뱉어야 한다.
import { IsNotEmpty } from "class-validator";
export class createUserDto {
    @IsNotEmpty()
    USER_ID: string;
    @IsNotEmpty()
    USER_PW: string;
    @IsNotEmpty()
    USER_PHONE: string;
    @IsNotEmpty()
    USER_NICKNAME: string;
}
- user.controller.ts
- 위에서 설명한 것과 동일하게 @Body 안에 ValidationPipe를 넣어주고 받는 값을 class-validator 가 적용되어있는 createUserDto로 만들어줬다.
- ValidationPipe가 잘 걸러준다면 Dto에서 정한 키들이 모두 값이 있지 않으면 에러를 뱉어낼거다.
- ValidationPipe를 통과한다면 받은 req를 그대로 뱉어주는 간단한 코드이다.
import { Body, Controller, Post, Request, ValidationPipe } from '@nestjs/common';
import { UserService } from './user.service';
import { createUserDto } from './dto/create.user.dto';
createUserDto
@Controller('user')
export class UserController {
  constructor(private readonly userService: UserService) {}

  @Post('/create')
  create(@Body(ValidationPipe) test: createUserDto) : createUserDto{
    return test
  }
}
- 직접 한 번 보자 (글쓴이는 Postman 이용)

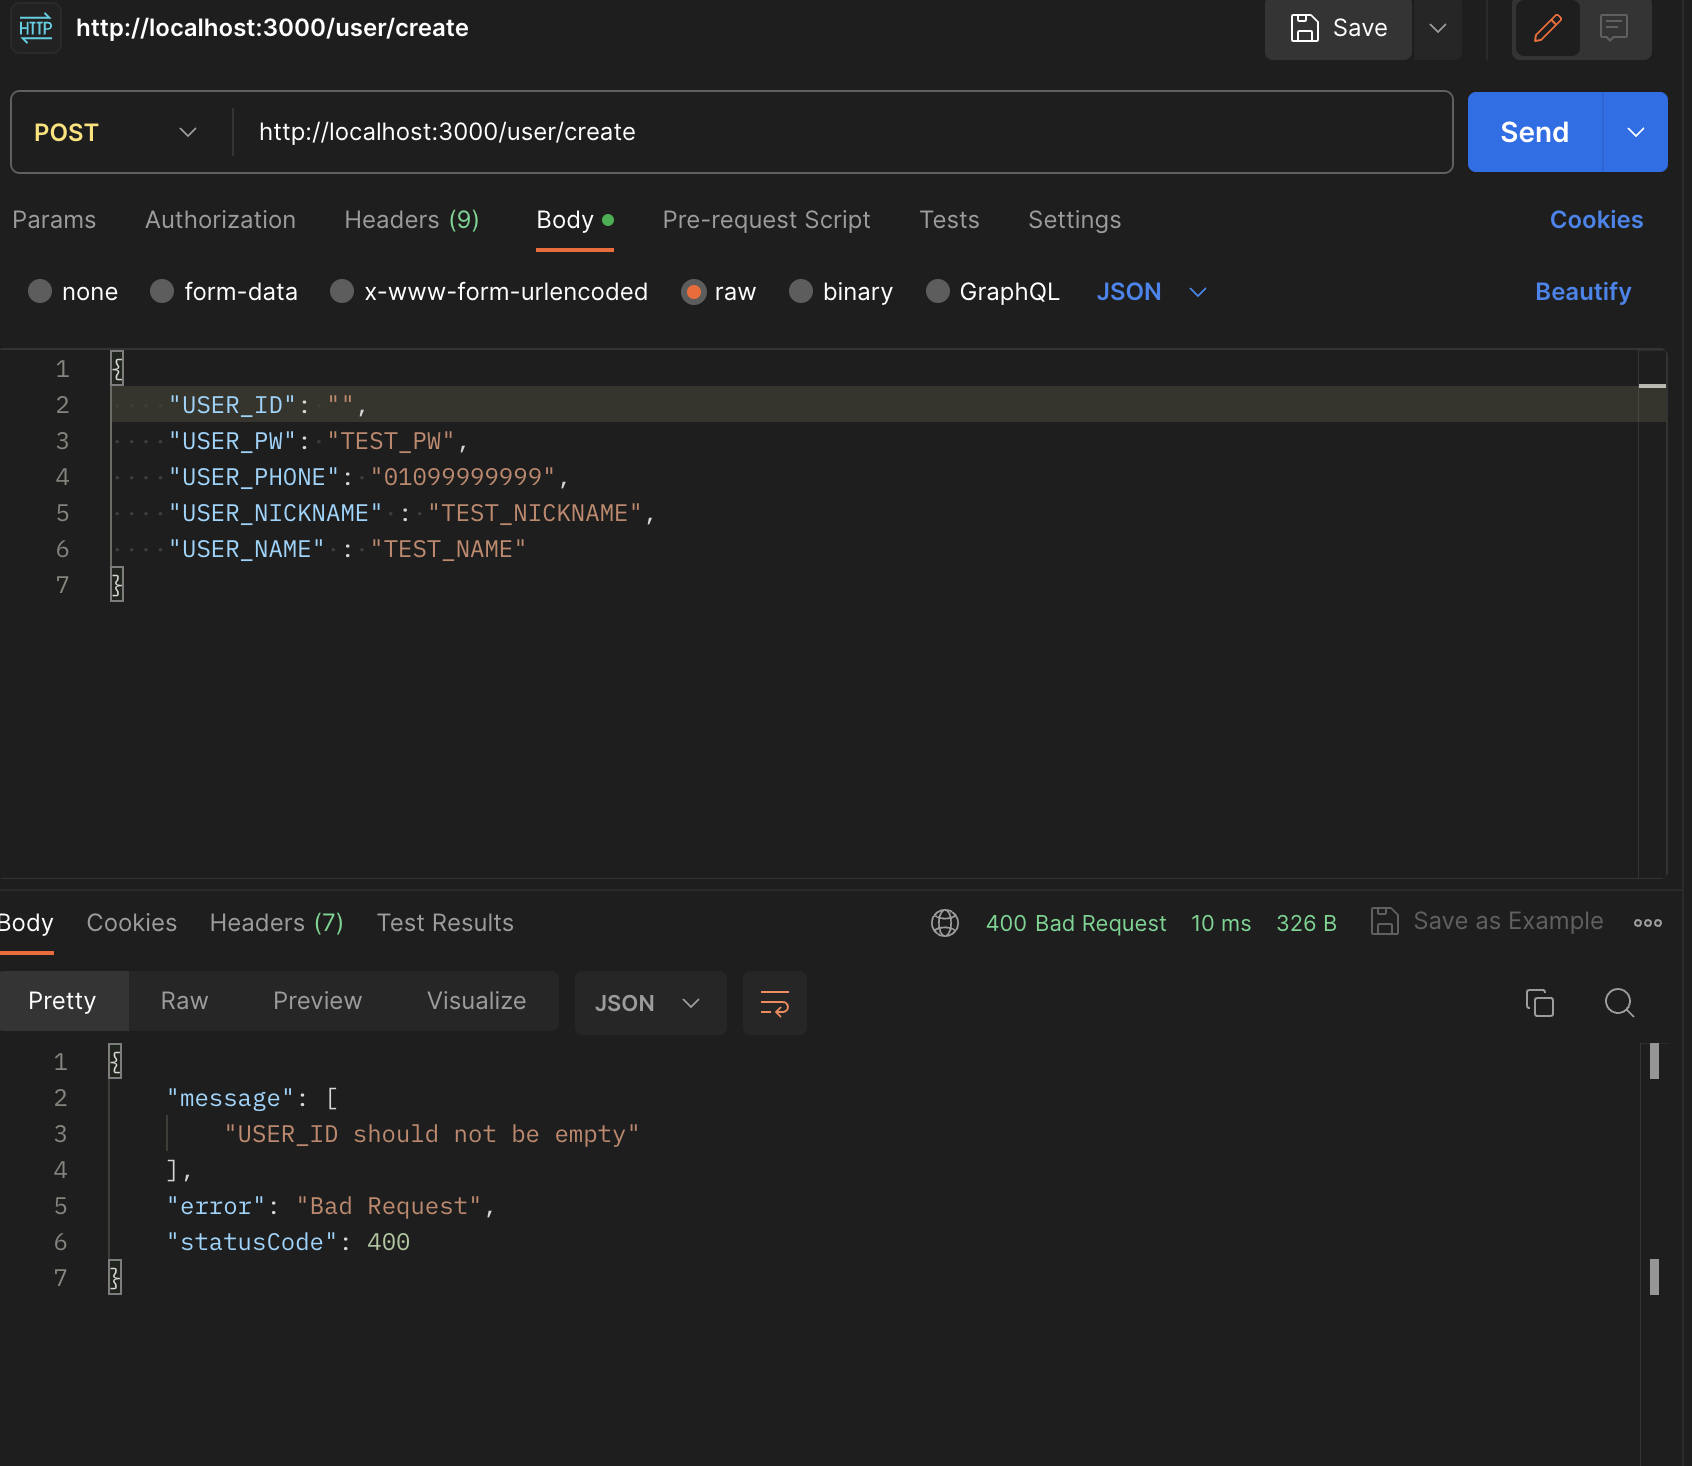

- 여기서는 ID, PW 공백일 떄 에러를 뱉어주고 마무리한다.
- 하지만 실제로 코드를 작성할 때는 내가 dto에 정해준 데코레이터들이 유효성 검사를 잘 해주는지 키마다 모두 꼭 확인해줘야 한다.
'Node.js > NestJS' 카테고리의 다른 글
| [NestJS] Passport.js와 session을 사용해 로그인 인증 구현하기 (2) | 2023.09.03 |
|---|